
Hello, fellow flutter developers!
This complete documentation will guide you from a no subscription flutter app to a solid implementation of subscriptions into your flutter app. Keep in mind that all successful subscription apps need to solve the 3 biggest problems for in-app purchases.
Typically, the IAP problems are not really known, so it is best to have a discussion with the team plus the product owner how to solve these problems to develop a successful subscription app. It sometimes also helps to just share an article with the responsible people to raise awareness.
Our focus will be Auto-Renewable Subscriptions. Quick explanation: If a user purchases an Auto-Renewable Subscription, the user will be granted access to a special service or content for a week, a month, a quarter, 6 months or a year. The user can always decide to cancel or renew the subscription before the next period starts.
There are 3 ways to implement subscriptions in your app. The first would be to integrate the official Android and iOS purchase libraries provided by Apple and Google. This would require you to write Swift and Kotlin and create a bridge to the flutter application.
To avoid re-inventing the wheel, the flutter devs created a package that manages the native implementation and created a bridge to your flutter app (option #2). If you use the flutter package, you only need to handle the flutter implementation of subscriptions and manually add your created subscription Ids and validate the receipt on your server.
The third way would be to use LinkFive, which uses the official flutter package but adds a dynamic layer on top of the official plugin and gives you the option to dynamically change your subscription offering even after you have released the app and also validates purchases with the LinkFive backend system.
Flutter in_app_purchase or linkfive_purchases plugin
Every so often, it is difficult to decide between different plugins. Here is a brief overview on the benefits of using the LinkFive Flutter plugin compared to the in_app_purchase plugin.
Option 1: Use the Flutter Plugin in_app_purchase (Provider example)
Luckily, there is a ready-to-use plugin that has already implemented the native Android and iOS integration of subscriptions for your app. The plugin uses the official Android and iOS libraries for subscriptions and creates a bridge to your Flutter app.

Let's start right away with the plugin.
1. Add the In-App Purchase Dependency
Just add the dependency to your pubspec.yaml file or add the dependency with the flutter client:
1$ flutter pub add in_app_purchasein your pubspec.yaml:
1dependencies:2 in_app_purchase: ^3.1.7The version might be outdated already. Please check the latest version on Pub.dev
2. Initializing the Plugin and connecting to the underlying store
You can read all the detailed steps on the official documentation. We will outline the key parts.
Listen for subscription purchase updates
The plugin uses streams to communicate with the native subscription integration. You can use any state management system along with the plugin in your app. You can also just use a StatefulWidget, but it's not recommended. I would suggest the Provider or Riverpod package for your state management. There are other state management systems like bloc or getX, but for simplicity, we will focus on the provider package.
Create a new file in your provider folder: subscriptions_provider.dart and listen for subscription updates.
1class SubscriptionsProvider extends ChangeNotifier {2 3 // save the stream to cancel it onDone4 late StreamSubscription _streamSubscription;5
6 SubscriptionsProvider() {7 final Stream<List<PurchaseDetails>> purchaseUpdated = InAppPurchase.instance.purchaseStream;8
9 _streamSubscription = purchaseUpdated.listen((purchaseDetailsList) {10 // Handle the purchased subscriptions11 _purchaseUpdate(purchaseDetailsList);12
13 }, onDone: () {14 _streamSubscription.cancel();15
16 }, onError: (error) {17 // handle the error18 });19 }20
21 _listenToPurchaseUpdated(List<PurchaseDetails> purchaseDetailsList) {22 // Purchased Subscriptions23 }24}The provider will listen to purchase updates whenever you start consuming the SubscriptionProvider. Let's jump directly into the method.
1_purchaseUpdate(List<PurchaseDetails> purchaseDetailsList) {2
3 // check each item in the provider list4 purchaseDetailsList.forEach((PurchaseDetails purchaseDetails) async {5
6 // Sometimes the purchase is not completely done yet, in this case, show the pending UI again.7 if (purchaseDetails.status == PurchaseStatus.pending) {8 _showPendingUI();9
10 } else {11
12 // The status is NOT pending, lets check for an error13 if (purchaseDetails.status == PurchaseStatus.error) {14 // This happens if you close the app or dismiss the purchase dialog.15 _handleError(purchaseDetails.error!);16
17 } else if (purchaseDetails.status == PurchaseStatus.purchased ||18 purchaseDetails.status == PurchaseStatus.restored) {19
20 // Huge SUCCESS! This case handles the happy case whenever the user purchased or restored the purchase21 _verifyPurchaseAndEnablePremium(purchaseDetails);22
23 }24
25 // Whenever the purchase is done, complete it by calling complete.26 if (purchaseDetails.pendingCompletePurchase) {27 await InAppPurchase.instance.completePurchase(purchaseDetails);28 }29 }30 });31}It is significant to confirm the purchase. If your app does not confirm the purchase, it will be automatically revoked by Google or Apple after 3 days and the amount will be refunded to the user.
Whenever the status is purchased or restored, we have to check if the purchase is valid and if true, show the premium features according to the subscription plan.
1_verifyPurchaseAndEnablePremium(PurchaseDetails purchaseDetails){2 3 // check if the purchase is valid by calling your server including the receipt data.4 bool valid = await _verifyPurchase(purchaseDetails);5 if (valid) {6
7 // Purchase is valid, time to enable all subscription features.8 _enablePremiumFeatures(purchaseDetails);9
10 } else {11 12 // The receipt is not valid. Don't enable any subscription features.13 // _handleInvalidPurchase(purchaseDetails);14 }15}In any case, you should verify that a subscription is valid on your server by sending the receipt data to your server's endpoint and calling either Apple or Google to verify whether it is valid or not.
In 2022, Apple introduced the new App Store Server API which can be used to query the transaction without the receipt. All you need is a working server to server App Store connection and the user‘s transactionId.
You could also skip this part but this will open your business to false-positive subscribers.
3. Connect to the underlying store and receive your subscription data
Whenever you think it's time to offer your subscriptions to your user, you need to get subscription data such as the price, the currency and the duration of the subscription. If you started from scratch, there are probably no subscriptions created on the Google Play Store and Apple App Store yet. This is expected and not an issue. You can continue with the integration and replace the subscription Ids later on.
Let's create another method inside the subscriptions_provider.dart to fetch the information we need.
1fetchSubscriptions() async {2 final bool available = await InAppPurchase.instance.isAvailable();3 if (!available) {4 // The store cannot be reached or accessed.5 // This could also be the case if you run the app on emulator.6 // Please use a physical device for testing.7 return;8 }9
10 // Hardcode subscriptionIds you want to offer.11 const Set<String> _subscriptionIds = <String>{'sub1', 'sub2'};12 final ProductDetailsResponse response = await InAppPurchase.instance.queryProductDetails(_subscriptionIds);13
14 if (response.notFoundIDs.isNotEmpty) {15 // IDs that does not exist on the underlying store.16 }17
18 // all existing product are inside the productDetails.19 List<ProductDetails> products = response.productDetails;20
21 // Store the subscription and notify all listeners22 notifyListeners();23}You can now show the subscriptions you want to offer and update your UI elements accordingly.
Also, you need to add the subscription IDs manually, which makes it very difficult to change the subscription offer. You may want to try LinkFive to dynamically add the subscriptions to your app and change the subscriptions in seconds without creating and uploading a new app version.
4. Purchase a subscription
To make a purchase, you need to call the purchase method with the productDetail the user selected. A subscription is a non-consumable product since the user can only purchase a subscription once at a time. once the subscription is active, the user cannot purchase it again. If the subscription has ended or got cancelled by the user, the subscription can be purchased again.
1// prepare the PurchaseParam2PurchaseParam purchaseParam = PurchaseParam(productDetails: productDetails); 3
4// Purchase the Subscription5InAppPurchase.instance.buyNonConsumable(purchaseParam: purchaseParam);The purchase flow should start now and will call the subscription listener in any case on success or error.
5. Restore a subscription
If the user pressed on the restore button of your paywall (which is required on iOS), call the restorePurchases method. This will fetch all existing subscriptions and deliver them to the purchase listener which we created in the beginning.
1InAppPurchase.instance.restorePurchases();6. Run the App without creating Google Play or App Store subscriptions
If you provide the wrong subscription identifiers or did not create any Ids yet, the response notFoundIDs will be filled with the provided IDs. This is expected for the first run.
If you start with Android, please upload your Android App to the Google Play Store and create your subscriptions afterwards. If you start with iOS, just go to App Store Connect and create your Subscriptions.
Option 2: Use the Flutter Plugin linkfive_purchases (Provider example)
The plugin takes care of delivering the subscriptions IDs to your app by adding a layer between the in_app_purchase and adds much more flexibility to your flutter app. It automatically fetches the subscriptions which you can configure via the web app and adds additional functionality e.g. a dynamic paywall to your flutter app.
LinkFive also introduced a complete subscription user management in version 2.0.0 and above.
A short overview can be found on our Flutter Integration page.
Let's start by adding the plugin to your flutter project.
1. Add the LinkFive Purchases Dependency
Add the dependency to your pubspec.yaml file or add the dependency with the flutter client:
1$ flutter pub add linkfive_purchasesin your pubspec.yaml:
1dependencies:2 linkfive_purchases: ^3.0.0The version might be outdated already. Please check the latest version on LinkFive Pub.dev page
2. Add Subscriptions using the LinkFive Purchases Plugin
It's really easy to implement subscriptions with LinkFive, there are only 3 steps to add subscriptions to your flutter app. First, you need to initialize the plugin with the provider API KEY. You can get your API key here. It's for free!
1// Get your API key after sign up2await LinkFivePurchases.init("LinkFive Api Key");3
4// Get all product offers before you show your offer to the user.5LinkFivePurchases.fetchProducts();3. Listen to Subscription Updates
Just listen to updates via the LinkFive Stream and show the result to the user:
1// Subscriptions to offer to the user 2LinkFivePurchases.products;3
4// Active subscriptions the user purchased 5LinkFivePurchases.activeProducts;4. Purchase the Subscription
Purchase the product whenever the user clicks on the subscription.
1// This handles the entire purchase process2LinkFivePurchases.purchase(productDetails); That’s it, and enough to offer subscriptions to your users. Let's look into the provider example of the plugin.
You can configure your Products inside LinkFive website

Use the ready-to-use Provider Plugin
It's even easier with the LinkFive provider plugin available on pub.dev
1dependencies:2 linkfive_purchases_provider: ^3.0.0And all you need to do is to register the provider with the API Key.
1MultiProvider(2 providers: [3 // ...4 ChangeNotifierProvider(5 create: (context) => LinkFiveProvider("API_KEY"),6 lazy: false,7 ),8 ]9)You can use the provider to check if there is an active subscription or to offer subscriptions to your user.
Complete Provider Example
If you would rather not use the LinkFive provider plugin, you can, of course, create your own provider. Let’s start with the provider file and create a new file with the name: linkfive_provider.dart in your provider folder.
1class LinkFiveProvider extends ChangeNotifier {2 LinkFivePurchasesMain linkFivePurchases = LinkFivePurchasesMain();3
4 LinkFiveProducts? products;5 LinkFiveActiveProducts? activeProducts;6
7 List<StreamSubscription> _streams = [];8
9 LinkFiveProvider() {10 linkFivePurchases.init("keys.linkFiveApiKey");11 linkFivePurchases.fetchProducts();12 _streams.add(linkFivePurchases.products.listen(_productsUpdate));13 _streams.add(linkFivePurchases.activeProducts.listen(_activeProductsUpdate));14 }15
16 void _productsUpdate(LinkFiveProducts data) async {17 products = data;18 notifyListeners();19 }20
21 void _activeProductsUpdate(LinkFiveActiveProducts data) {22 activeProducts = data;23 notifyListeners();24 }25
26 Future<LinkFiveProducts?> fetchProducts() {27 return LinkFivePurchases.fetchProducts();28 }29
30 restoreSubscriptions() {31 return LinkFivePurchases.restore();32 }33
34 Future<bool> purchase(ProductDetails productDetail) async {35 return LinkFivePurchases.purchase(productDetail);36 }37
38 switchPlan(LinkFivePlan oldPurchasePlan, LinkFiveProductDetails productDetails,39 {ProrationMode? prorationMode}) {40 return LinkFivePurchases.switchPlan(oldPurchasePlan, productDetails,41 prorationMode: prorationMode);42 }43
44 45 void dispose() {46 _streams.forEach((element) async {47 await element.cancel();48 });49 _streams = [];50 super.dispose();51 }52}The Provider is now ready to use in your App and you will see the LinkFive Debug messages:
1I/flutter (32079): LinkFive: Store reachable2I/flutter (32079): LinkFive: push active sub data with size 03I/flutter (32079): LinkFive: set purchaseState value PurchaseState.NOT_PURCHASED
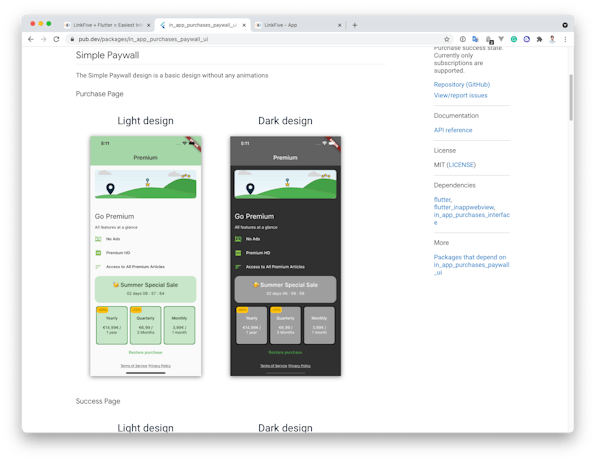
Flutter Custom Paywall UI Plugin
An even easier and faster way to get started is with the custom Paywall UI Plugin available on pub.dev. The Plugin was made by LinkFive to easily add a paywall with the purchases plugin. The UI package offers a couple of designs that you can use in your app for free – even if you don't use LinkFive.
Seamless integration with LinkFive Purchases Plugin
The plugin works immediately together with the linkfive_purchase plugin. No additional work needed
Only a few lines of code are required to display your subscriptions.
1SimplePaywall(2 callbackInterface: LinkFivePurchases.callbackInterface,3 subscriptionListData: subscriptionData,4 // ...5});The subscriptionData can be built yourself by creating an Object of `SubscriptionData`. Here is an example how you can use the intl package to create the desired data.
1List<SubscriptionData>? _buildPaywallData(BuildContext context, LinkFiveProducts? products) {2 if (products == null) {3 return null;4 }5 final subList = <SubscriptionData>[];6
7 for (final product in products.productDetailList) {8 final pricingPhase = product.pricingPhases.first;9 final durationStrings = pricingPhase.billingPeriod.jsonValue.fromIso8601(PaywallL10NHelper.of(context));10 final data = SubscriptionData(11 durationTitle: durationStrings.durationTextNumber,12 durationShort: durationStrings.durationText,13 price: pricingPhase.formattedPrice,14 productDetails: product.productDetails,15 );16 subList.add(data);17 }18
19 return subList;20}As an example, using the Provider plugin: Pass the callbackInterface from the provider and `List<SubscriptionData>` to the Paywall, and you're all set.
1Consumer<LinkFiveProvider>(2 builder: (_, provider, __) {3 // get subscription data from your provider or from your stream (as described above)4 LinkFiveProducts? products = provider.products;5
6 return PaywallScaffold(7 child: SimplePaywall(8 callbackInterface: LinkFivePurchases.callbackInterface,9 subscriptionListData: _buildPaywallData(context, provider.products),10 // ...11 );12 },13);The result will show the subscriptions, and it will handle everything related to a purchase. The page is currently an empty paywall that you can customize yourself using the plugin.
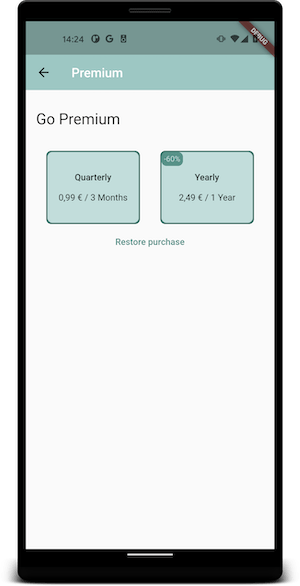
Out of the box Purchase State Management
The plugin also manages the UI state of the paywall, and the Plugin makes sure that either the success page or the premium page is displayed if the user has purchased Premium. You can always navigate to your premium page.
1// no additional code neededCheck out the Pub.dev page of the paywall plugin.
Enable Subscriptions for Android
Before you can create your subscriptions in the Google Play Store, Google wants you to upload an app version with the billing permission. You can also check if you already added the permission by going to the in-app products page in the developer console (Monetize > Products > In-app products). If it says: Your app doesn't have any in-app products yet - To add in-app products, you need to add the BILLING permission to your APK. Then you need to upload a new app version with the billing permissions first.
Add the BILLING Permission to your APK
Since 2017 it's not necessary to add the permission manually anymore. You can still add it manually but the permission will be merged automatically with the purchase library later.
Add Permission Manually
You can still add it manually, to do it, open the AndroidManifest.xml file. You can find the file in the following folder in your flutter project: android > app > src > main > AndroidManifest.xml
Add the com.android.vending.BILLING Permission to the Manifest root section.
1<manifest xmlns:android="http://schemas.android.com/apk/res/android" 2 package="app.tnx.equixo">3 4 <!-- other permissions -->5 <uses-permission android:name="com.android.vending.BILLING" />6
7 <application8 android:icon="@mipmap/ic_launcher"9 android:label="@string/app_name">10 <!-- your activities -->11
Upload your App to the Google Play Store
Now, build a new app version and upload it to your Alpha or internal track (Both work and are only for internal use)
After you've successfully uploaded a new version, you can go ahead and create your subscriptions.